
This tutorial goes through how to build a 1st person sneaking game with simple enemies/guards that patrols predefined routes and if they spot the PC they start to follow and attack if they get near enough. A short video clip demonstrates the guard behaviour this tutorial builds.
This tutorial assumes that you are familiar with Unity and can create game objects, prefabs, and scripts. The code snippets below are in C#.
For patrolling we need a way to define patrolling route by marking points via the guard should walk.
WaypointInterface.cs:
interface WaypointInteface {
     void SetTarget(Waypoint t);
}
Interface is for the classes that use Waypoints (defined below) so that the Waypoint class does not need to know what classes are are using Waypoints. All classes that use Waypoints inherits WaypointInterface and implements SetTarget function.
Waypoint.cs
using UnityEngine;
using System.Collections;

// Waypoints define routes that an agent can follow.
public class Waypoint : MonoBehaviour {

    // pointer to the next position in the patrol route
    public Waypoint nextTarget;

    void OnTriggerEnter(Collider other) {
        Debug.Log("Waypoint.OnTriggerEnter(): " + other.gameObject.name + " triggered " + name);
        // tags are used to ensure that only correct objects trigger behaviour
        // Any agents using waypoint needs to have the same tag than this waypoint has
        if(other.gameObject.CompareTag(tag)) {
             // The colliding GameObject should have WaypointInterface.SetTarget implemented
             // so we can notify what is the destination in the patrol route.
             WaypointInteface script = other.gameObject.GetComponent();
             if(script != null) {
                  script.SetTarget(nextTarget);
             }
             else {
                  Debug.LogError("Waypoint.SendNextTarget() " + other.name + " has no component with WaypointInterface.");
             }
        }
    }

    // Lets visualize waypoints in editor window
    void OnDrawGizmos() {
        // waypoint.psd should be in Gizmos folder
        Gizmos.DrawIcon (transform.position, "waypoint.psd");
        if(nextTarget != null) {

           if(nextTarget.tag.Equals(tag)) {
              // green line shows everything is OK
              Gizmos.color = Color.green;
           }
           else {
              // red line indicates that this and nextTarget has different tags
              Gizmos.color = Color.red;
           }
           Gizmos.DrawLine(transform.position, nextTarget.transform.position);
       }
   }
}
For waypoint we need an GameObject with box collider set to trigger. One easy way to create one is to create cube and remove its Renderer component. Rename the cube to Waypoint, attach Waypoint script to cube and set collider to trigger. In addition, add tag Guard1 and set it to the object. It is always good to create Prefab from the object so it is easy to add Waypoints to the scene.

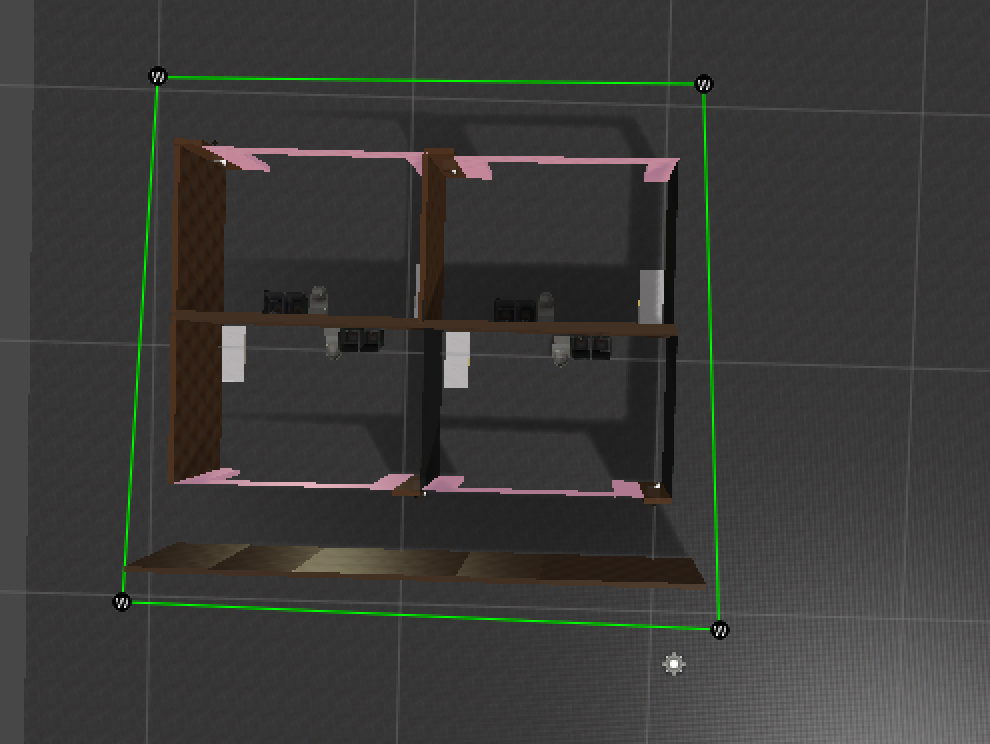
Next we need to build a level. That we need plain where the guard can walk, waypoints and some obstacles. Figure below gives an example of a level.
Now we need the guard. I base it to the NavMeshAgent. Lets start with a simple version that can move and follow the route determined by the waypoints.
SimpleAgent.cs
using UnityEngine;
using System.Collections;

public class SimpleAgent : MonoBehaviour, WaypointInteface {

    // A pointer to the route defined by the waypoint. Agent starts to follow route
    // from this waypoint
    public Waypoint target;

    private NavMeshAgent agent;

    void Start () {
       // initialising NavMeshagent
       agent = GetComponent();
       if(target) {
           // set the first desitination to the NavMeshAgent
           // and the agent will take lead from that
           agent.destination = target.transform.position;
       }
    }

    void WaypointInteface.SetTarget(Waypoint t) {
       // Waypoint reached. Setting the next destination.
       target = t;
       if(target) {
           Debug.Log ("Guard.SetTarget(): " + name + ": next target = " + target.name);
           agent.destination = target.transform.position;
       }
       else {
           Debug.Log ("Guard.SetTarget(): " + name + ": no next target. Stoping");
           agent.Stop();
       }
   }

   void OnDrawGizmos() {
       // visualizing the planned path of NavMeshAgent for debuging
       // with complex path this might be cause lack
       try {
          if(agent.path.corners.Length < 2) //if the path has 1 or no corners, there is no need
             return;

          for(int i = 1; i < agent.path.corners.Length; i++){
             Gizmos.DrawLine(agent.path.corners[i-1], agent.path.corners[i]);
          }
       }
       catch(System.Exception) {}
    }
}
Now it is time to build Simple Agent object. I start from a cube. Add following components to the cube:
- SimpleAgent and drag-and-drop a Waypoint to Target
- NavMeshAgent
- RigidBody (Is Kinematic should be clicked on)
Setup is show in image below.

RigidBody is needed to make collisions to work.NavMeshAgent handles movement and navigating in the scene. However, we need to set-up the scene for NavMeshAgent. First, we need to mark the plane as walkable.

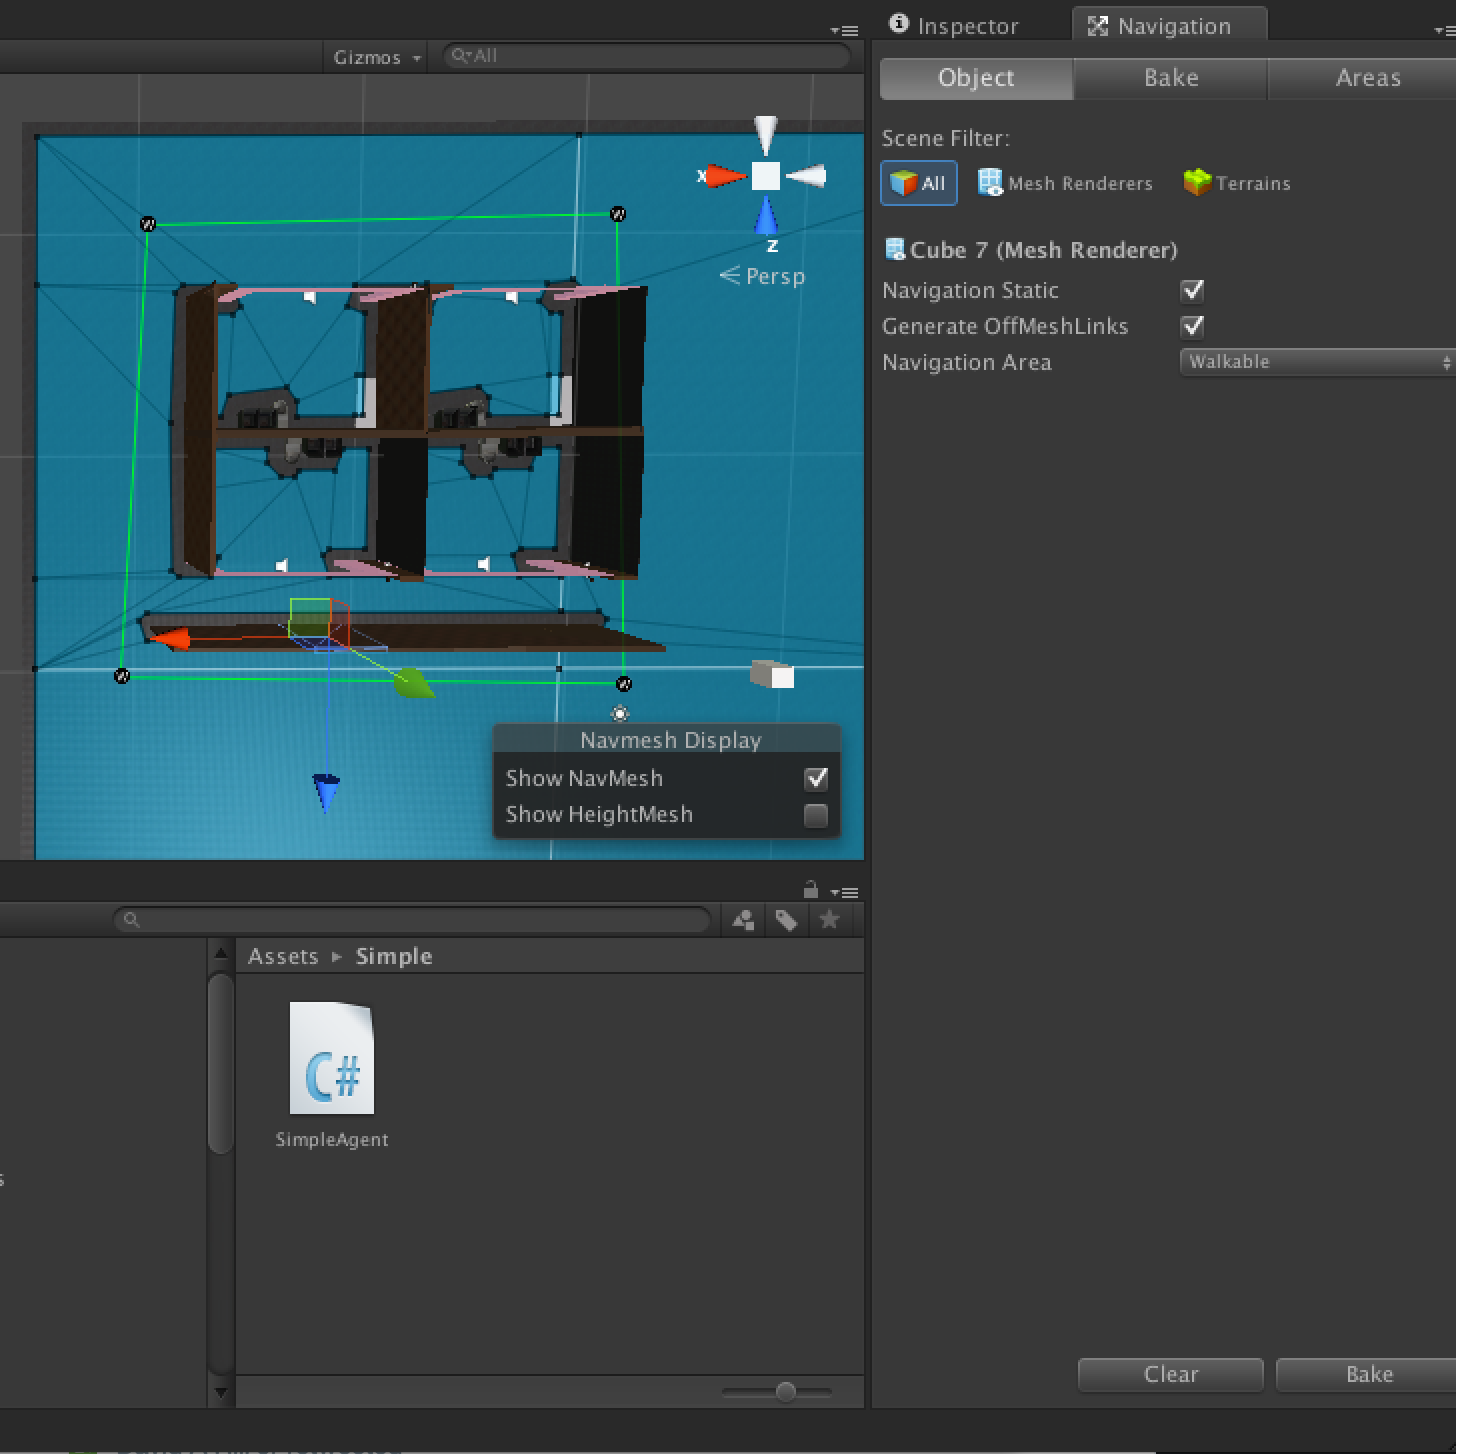
We also need to mark all static object in the scene as static (Navigation Static). You can show Navigation Tab from Window -> Navigation.

Now it is time to bake navigation. Go to Navigation tab and click bake. Following image shows how the baked scene looks like when navigation tab is selected.
Now we should have an agent that follows waypoint route. Following video shows the agent in action. You can test different waypoint placements to see how the NavMeshAgent and wayfinding works.
