
It is time to create a start menu for the game. For that, we need a scene. After creating the scene, rename the scene file to “start_screen” or something like that.
(Scroll down for the links to previous parts of this tutorial.)
Add the scene to the build settings (File->Build Settings…)
Make sure that start_screen scene is scene number zero (that scene will be loaded when the game starts).
Below in fig schematics of the start screen is shown. Arrows indicate state transitions triggered by button bushes.

To easily show the main screen and subscreens (OK to start new, Credits, OK to quit) we need canvases for each and script that set canvases active when they should be shown. That script should also handle the logics needed to start a new game or continue an already started game.
StartScreen.cs:
public class StartScreen : MonoBehaviour {

	// Canvases that contains all the screens
	// of the start menu
	public Canvas mainScreen;
	public Canvas creditsScreen;
	public Canvas confirmNewGameScreen;
	public Canvas confrimQuitScreen;

	// Info what is the name of level that should be loaded
	// with a new game selection
	public string nextLevel;

	private string currLevel;

	void Start () {
		currLevel = PlayerPrefs.GetString(PlayerLogic.CURRENT_LEVEL_KEY);
		if (currLevel != "") {
			Debug.Log ("StartScreen.Start(): last completed level: " + currLevel);
		}
		if (nextLevel == "") {
			Debug.LogError ("StartScreen.Start(): Specify the level that for new game at " + name);
		}
		MainScreenCb();
	}

	public void CreditsButtonCb() {
		mainScreen.gameObject.SetActive(false);
		creditsScreen.gameObject.SetActive(true);
	}

	public void MainScreenCb() {
		// we make sure that the main screen is shown and
		// subscreens are hidden.
		mainScreen.gameObject.SetActive(true);
		creditsScreen.gameObject.SetActive(false);
		confrimQuitScreen.gameObject.SetActive(false);
		confirmNewGameScreen.gameObject.SetActive(false);
	}


	public void ConfirmQuitCb() {
		// the player clicked the quit button. Now we hide
		// the main screen and show confirm quit canvas
		mainScreen.gameObject.SetActive(false);
		confrimQuitScreen.gameObject.SetActive(true);
	}

	public void ConfirmNewGameCb() {
		// the player clicked the new button. Now we hide
		// main screen and show confirm new game canvas
		mainScreen.gameObject.SetActive(false);
		confirmNewGameScreen.gameObject.SetActive(true);
	}

	public void QuitCb() {
		// the player clicked quit in confirm quit
		// exiting...
		Debug.Log ("StartScreen.QuitCb()");
		Application.Quit();
	}

	public void NewGameCb() {
		// The player confirmed a new game selection
		// Deleting a possible old save file
		// and creating new save information
		// and loading the first level after that
		Debug.Log ("StartScreen.NewGameCb()");
		mainScreen.gameObject.SetActive(false);
		PlayerLogic.DeleteSave();
		GameAgents.NewSGameSqn();
		Application.LoadLevel(nextLevel);
	}

	public void ContinueCb() {
		// The player clicked continue
		// loading the level based on save information
		mainScreen.gameObject.SetActive(false);
		Application.LoadLevel(currLevel);
	}

}
Add StartScreen script to an empty game object (and rename that game object as StartScreen).
After you have added Button and Text game objects under each canvas, you need to connect each button to the correct function in the StartScreen script.
To add function to a button, I give an example about adding function call to the New Game button:
- Select the button on the hierarchy view.
- Scroll down on the Inspector view until you see On Click area under Button script component
- Click +
- Select StartScreen game object (click the small circle on the left-hand side, bottom row of the On Click area).
- Select ConfirmNewGameCb function on the pop-up list on the right-hand side of On Click area.
The NewGame Button On Click area should look like as in the figure below after you have done this.
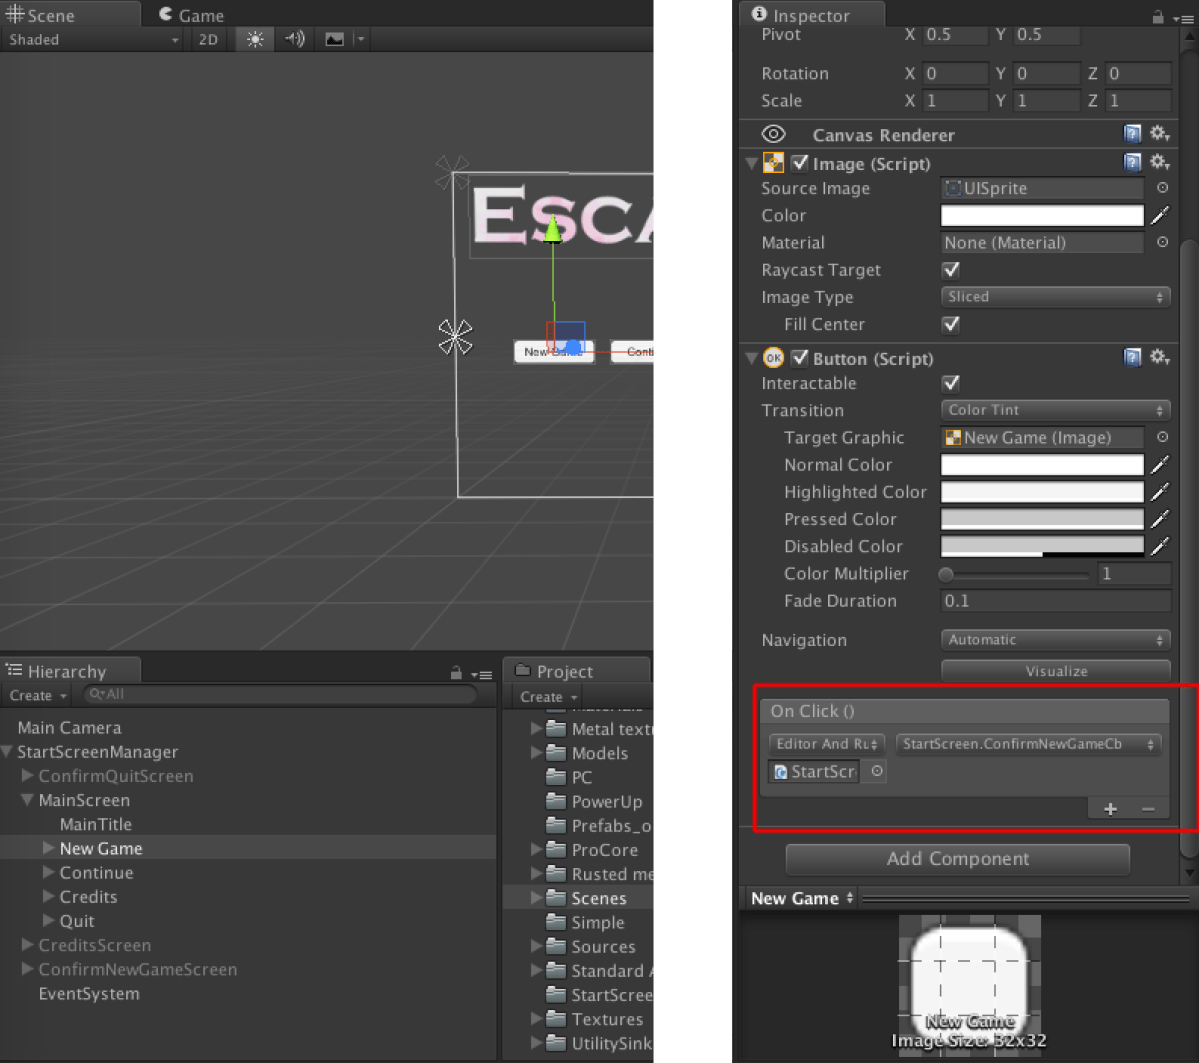
After this add functions to all Button game objects.
MainScreen
- Credits Button should call CreditsButtonCb()
- NewGame Button should call ConfirmNewGameCb()
- Continue Button should call ContinueCb()
- Quit Button should call ConfirmQuitCb()
CreditsScreen
- Back button should call MainScreenCb()
ConfirmNewGameScreen
- Back button should call MainScreenCb()
- OK button should call NewGameCb()
ConfirmQuit
- Back button should call MainScreenCb()
- OK Button should call QuitCb()
Now we are almost ready. Remember to set button and text anchors so that the screens looks OK also in different resolutions and aspect rations.
Previous parts of the tutorial
